Blood Containers

Blood containers have many features, including customizable textures and tags, the ability to sell blood, lumens, or cider to other players directly from your containers, and the ability to sell containers from your own affiliate vendors. See below for details!
All you need to do to use your container is rez it by dragging it out of your inventory window, then left-clicking on it once it rezzes to access the menu. Once you access the menu, you are set as the user of the container and you have 30 seconds to respond to the menu before it clears. No one else can access the container during this time. The menu has the following options:
- Drink Allows you to drink blood from the container.
- Fill Allows you to fill the container from your veins.
- Select Connect your container with other items, such as refills, refill stations, siphons, and metric senders like coffins. This button will connect your container with other items. Press this button when instructed to by other items.
- Info Get the current status of the container, including security settings, sales settings, container ID, and amount. Pressing this button will also refresh the meter on your container, and synchronize it with the Bloodlines server.
-
Security
Set how people are authorized to use your container.
- Access mode:
- Open Any registered Bloodlines member will be able to access your container.
- Restricted Whether someone is authorized to access your container depends on your user list and your group mode. If group mode is off and no one is on your user list, only you will be able to access your container. See group mode and user list, below.
- Locked Only you will be able to access your container. This overrides all other security settings. Even if you have users added to the user list, and group mode on, if your container is set to Locked, only you can access it.
- Trans. mode: Determines how authorized users are allowed to interact with your container. You can set this to Fill/Drink or Fill Only. If set to Fill Only, authorized users will only be able to fill, but not drink from your container.
- Group mode: Set group mode to on or off. It is off by default. If group mode is on, and access mode is restricted, it means that people in the group that the container is set to will be able to access the container. You can set the group of a container by right-clicking on the container and selecting 'edit'. This will open your build properties window. in the 'General' tab of this window, you should see a control group labeled 'Group', and a button that lets you set the group of the container. If you set the group to a group that is open-join, anyone who joins the group or is invited to it will be authorized to use your container, so be very careful about your group settings when setting this option. Users who wish to use containers under this option must have the container group set as their current active group in order to be authorized.
- User list: Manage your user list. You can add up to 25 names of avatars to each container, and these avatars will be authorized to use the container when it is in restricted mode. This option gives you a menu where you can add, remove, and clear the list. To view the full user list, select 'Info' on the main menu.
- View record: View a list of the most recent drink and fill transactions that have taken place with this container.
- Access mode:
-
Options
Various options:
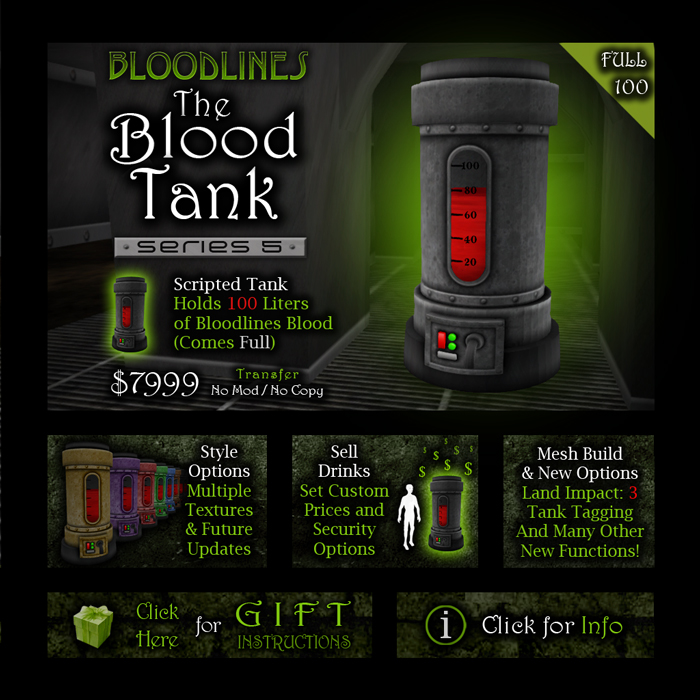
- Tag: Set an optional tag on your container, up to 25 characters. This will add the tag to the hover text of the container, and add it to the end of the container's name, so you will be able to see it even when the container is in your inventory. This is helpful for keeping track of which container is which. There is also a shortcut key to set the tag to the ID of the container.
- Hover Text: Turn the hover info text on and off.
- Text Color: Change the color of the hover text.
- Updates: Check for updated versions. In the future, if there are updates available, this button will deliver you the updater.
-
Sales:
Set sales options. There are three options: Sales ON/OFF, Siphons ON/OFF, and Price. Sales and siphons are off by default, and the default price is L$50. In order for someone to be able to buy metrics from your container, they still have to be authorized to use your container according to the security settings.
- Price: Set the price per liter or price per lumen for direct sales to others from your container. If you select this item, you will be prompted to chat a price to the container. You can set this while sales are on or off, and it won't affect the sales status of the container.
- Sales ON/OFF: If you turn sales on, authorized users will not be able to drink from your container without paying. Please see the section on 'Selling Metrics From Your Containers'.
- Siphons ON/OFF: If you turn siphons on, authorized users will be able to pay to siphon directly from your container into their container. They need to own the siphon, but they don't need to actually rez the siphon there or use it directly. See 'Selling Metrics From Your Containers'.
- Texture: Set the texture of your container. These textures are updateable from the Bloodlines server, so we will be releasing add-on texture packs.
- Spigot: Toggles on and off a blood particle effect coming out of the tank Spigot.
- Done: Finish your user session so other authorized users can use the container.
Selling Metrics From Your Containers
When setting your containers up to sell metrics, please note the following.
Security Still Applies
If you have your container set to locked, but sales are on, no one will be able to buy metrics from your container. If you want everyone to be able to buy from your container, turn sales on, and set security to 'open'. If the container is open, and sales are on, no one will be able to drink without paying. The blood transfer takes place on the transfer of lindens. If you only want certain people to be able to buy from the container, then set it to restricted, and add those people to the user list, or put them in a group, and turn on group mode. See Security settings above for more information.
Drink Purchase Sequence
The sequence for a customer to buy from your container goes like this: They click on the container. If they are authorized to access it, it gives them a menu. If sales are on, they will get a 'Drink' button. When they press 'Drink', they will get a menu that tells them what quantities they can purchase, and the cost of those quantities. Now is when they can pay the container, and receive the specified amount. Once they pay the container, or press 'Done', the transaction is over.
Siphon Purchase Sequence
The siphon feature allows people to buy larger quantities directly from your containers. Customers who wish to use this feature need to own the Bloodlines siphon that works with the type of container they wish to siphon from. The sequence goes like this: They click on the container. If they are authorized to access it, it gives them a menu. If sales are on, they will get a 'Siphon' button. When they press this button, they get another menu instructing them to rez their container (they do not need to use their siphon, they just need to own one), touch it, and then press 'Select', then press 'Proceed' on the current menu. Once they do this, they will get a new menu of prices and amounts they can siphon, and they pay the container according to how much they want to siphon. If they are siphoning into a series 5 container, their container meter will update. If they are siphoning into any container older than series 5, the metrics will transfer, but the visual meter on their container will not update unless they are wearing the refill station key. If they pick up and re-rez their container, it should update the meter.
Debit Permission and Refunds
When you set your container to sell metrics or to allow siphons directly to other containers, it will ask to you grant Debit permission to the container. This debit permission is only used in order to send refunds to people in case there is an error, and it only will pay back exactly what the person has paid you. For example, if the wrong person pays the container while the pay buttons are active, it will refund them, and cancel the transaction. Or, if the right person pays the container, and there is some transaction error, it will refund them and cancel the transaction.